These days I’ve been loving coconut water. It’s so refreshing during these hot Atlanta summer days. One day while sipping on this glorious liquid, I thought to myself, “Hmm…what if I combine coconut water and coffee in some way?” Here we are, my friends. Coffee cold-brewed in coconut water.
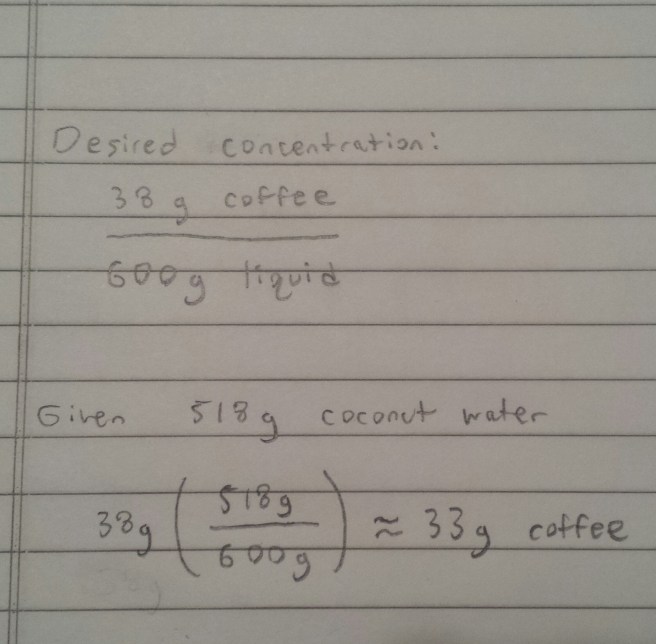
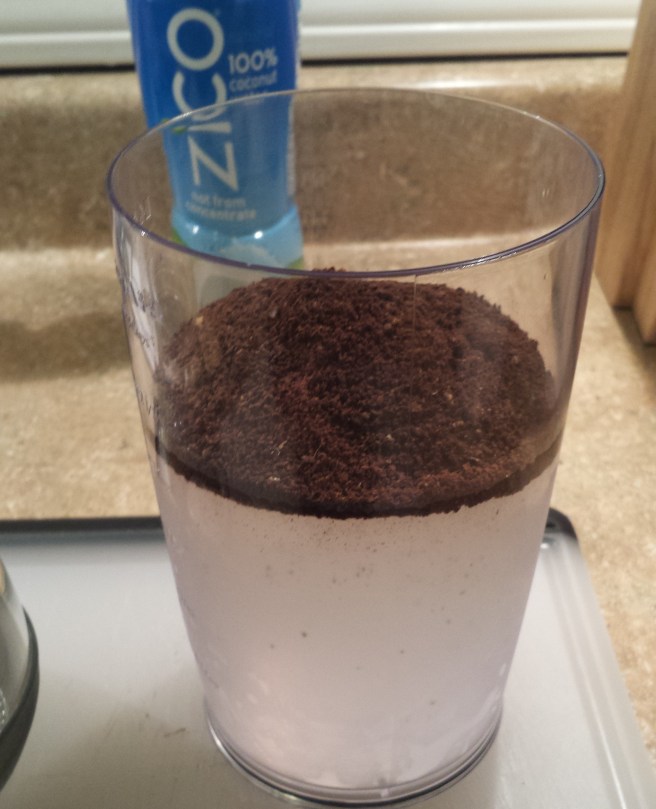
My intuition tells me this will be disastrous, but it is worth a fair shot. I like to do cold brews at double the concentration of standard hot drip. I do pour overs at 19g of coffee per 300g of water, so for this I’ll do 38g of coffee for 600g of coconut water. One bottle of coconut water yielded merely 518g of coconut water for me. Oh no! But no worries, it was time to finally put my mathematics degree to good use.
Exciting, right?! This is getting scientific.
I used some fairly old beans from Toby’s Estate based in Brooklyn. I bought their single-origin Panama back in November, but cold-brewing with old beans has given me solid results in the past. Let’s see!
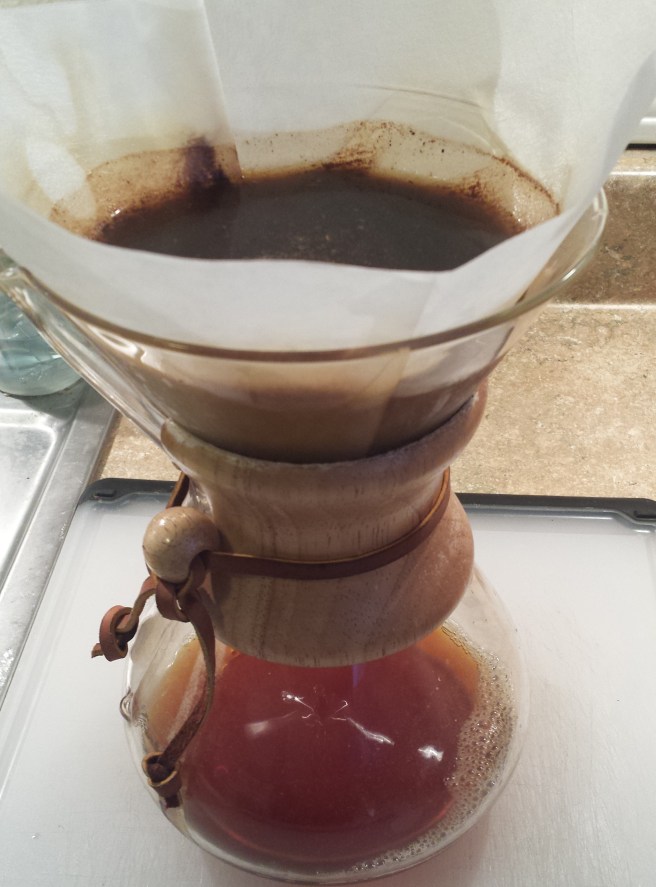
I gave this a nice mix and let it steep in my fridge for 21 hours. Then filter through Chemex.
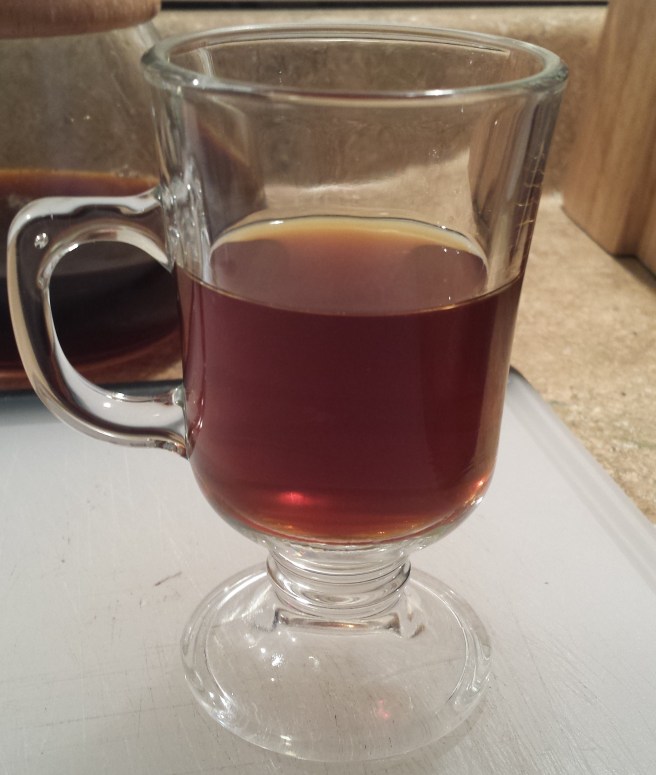
What a lovely reddish color! Coconut water is naturally translucent, so this is an interesting consequence. But it’s time, the taste test!
DISASTER. My intuition served me well here. Oh boy, this tastes just awful. It is harshly acidic on the tip of the tongue, and the finish leaves such an unpleasant taste in my mouth. I didn’t expect the interaction to turn out quite this badly. But, at least now I know this is not a good idea. Back to the drawing board.
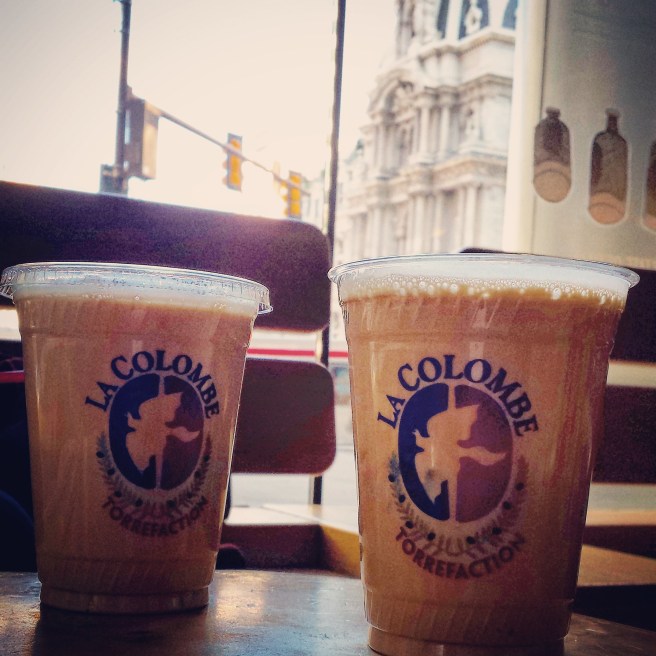
Moving away from Philly was heartbreaking in so many ways. In my four years in that wonderful city, I developed a deep love for coffee. I remember the first time I walked into the La Colombe shop in Rittenhouse in the summer of 2012. Classy wooden floors, a shiny marble bar, and impressive espresso machines behind the baristas. I knew very little about coffee back then, so I naively ordered an iced latte on that hot summer afternoon. I’m gonna be totally honest – iced lattes suck. Hot espresso poured over ice, then topped with cold milk. It’s a watery, milky mess lacking the frothy texture of a real latte.
A little over a year ago, La Colombe rolled out a solution to this problem: the Draft Latte. Frothed milk, cold-pressed espresso, lightly sweetened. This was achieved without using any heat. The elements are always cold and combine into the ideal iced latte.
Today I live in Atlanta, far away from Draft Latte territory. When the Draft Latte cans were rolled out on La Colombe’s website, I ordered a 10-pack within 20 minutes of the page going live. The cans were just spectacular! I felt the Draft Latte dream renewed in my life, but it couldn’t let it end after these 10 cans – I decided to recreate La Colombe’s Draft Latte at home.
The primary constaint: no heat. I thought to use a stand mixer and its whisk attachment, or possibly an immersion blender, to achieve frothy milk without heat. Combine that with cold brew coffee to produce a domestic version of the Draft Latte.
Experiment 1 – stand mixer vs. immersion blender
I started off by preparing some cold-brew coffee. For normal drip coffee I use about 16g of coffee per 300mL of water, which fills a standard mug. I’ve heard to double the concentration for cold brew, so I used 32g coffee per 300mL of water. I wanted about two mug-fulls, so I doubled each.
I let the coffee grinds steep for 24 hours in my fridge. The next day, I filtered the mixture through a Chemex. I couldn’t resist taking a sip of this cold brew. Wow!! Hands down the best cold brew coffee I’ve ever tasted!
Now here comes the real fun: the frothing. I used a 1:1 ratio for cold brew coffee and milk.
The clear winner is whisking. Whisking creates more milk and air interaction to create frothy goodness, while the immersion blending perhaps did a slightly better job in fully integrating the milk and coffee. I noticed that after allowing the drink to settle, the frothiness entirely dissolved away, especially in the immersion blending case. Also I felt the 1:1 coffee to milk ratio was too milky.
Experiment 2 – whisking, 3:2, and thickening
I focused solely on whisking milk in the stand mixer, and this time I used a 3:2 coffee to milk ratio. The frothy milk settling was, well, rather unsettling to me. I looked at the Draft Latte can for inspiration.
Acacia gum, also known as gum arabic, can be used as a thickening agent. I found several uses for it, like creating edible glitter and paint. I figured that a thicker liquid would whisk better and create more froth, but gum arabic is not easily found. Instead I used protein powder, hoping it would do justice in thickening the drink.
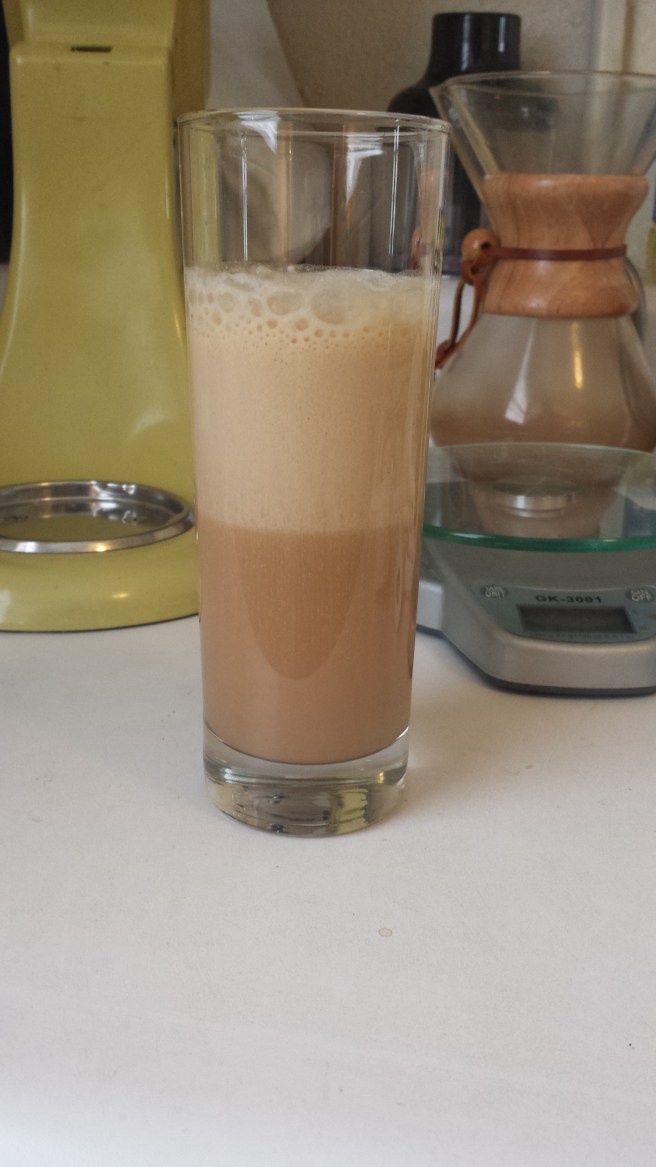
1/2 cup of cold brew, 1/3 cup of milk, 10 grams of protein powder, and a dash of simple syrup. After whisking and letting it settle, here’s the final product:
Just. Wow. Look at that layer of microfoam!! The protein powder did a wonderful job thickening the drink, and the stand mixer perfectly whipped up this faux Draft Latte. The 3:2 ratio was perfect, but the taste was slightly odd from the vanilla-flavored protein powder.
Despite the incredible foam on top, the settled liquid on bottom still needs work. The real Draft Latte maintains an aerated texture that feels mildly bubbly on the tongue, but my rendition felt mostly flat. I think La Colombe uses air and pressure in some way to retain that texture. I’m not positive if this can be achieved at home, but it’s worth thinking pondering. Perhaps I’ll grab some gum arabic and retry this process soon. But for now, I’m impressed with the result!